OpenGauge Card
OpenGauge Card
Like everybody who takes stuff apart, I have a box of salvaged screws. Old furniture, dead electronics, that appliance I stripped for the motor: everything ends up in the same pile. And then, months later, you need "a small one" and you have no idea if the thing in your hand is an M3 or an M4. You guess, you're wrong half the time, and you go get the caliper.
So when I saw the M-Card by Ghulaschsuppe on MakerWorld, I immediately thought it was a great little object: a credit card sized plate with calibrated holes for screws and nuts, M2 to M8, plus a ruler for the length. Print once, drop it in the box, done. Exactly the kind of cheap and genuinely useful thing I wanted to print a batch of and put in my shop, since I'm trying to monetize my prints these days.
Except I can't. The license doesn't allow it.
And that's fair enough, it's the author's model and their call. But it left me with an object I liked, a use case I had, and no legal way to do the thing I wanted to do with it. Even asking nicely and getting a yes wouldn't really fix it: I'd still be selling prints of a file I can't modify, since only the STL is shared and an STL is a dead mesh. Slice it, sure. Edit it, not really.
So I looked for a fully open source equivalent, source files included and a license that actually allows commercial use. I didn't find one. Same story as the gridfinity labels in my last post: the model I want always exists, just never under terms I can work with.
So I opened FreeCAD.
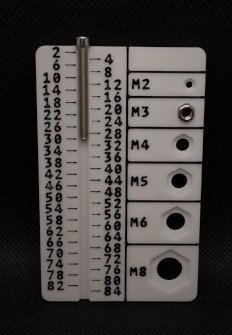
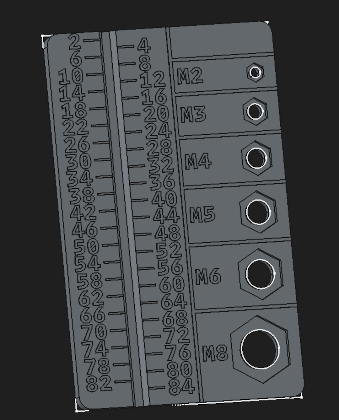
It's just a rectangle with holes, how hard can it be
Famous last words. It took me 6 iterations before the card was actually usable, and every time it was the same two things fighting each other.
The holes. A 4 mm hole in the model does not come out as a 4 mm hole on the plate. Extrusion bulges inward, plastic shrinks while cooling, and the hole always ends up too small. On a normal part you don't care, you push a bit harder or you drill it out. On a gauge it's fatal: if the M4 doesn't go through the M4 hole, the tool is lying to you and it's worse than useless. Most of the iterations went into finding how much to compensate. I ended up around +0.3 mm on the diameter, which is not a scientific value, just the number that finally worked on my printer with my filament: the screw slides in without slop, and the next size up still won't fit, which is the whole point of a gauge. Your mileage may vary, and that's exactly why the source file is there.
The text. Labels on a card this size are a few millimeters tall. Too thin and the slicer just deletes the strokes, so you get dotted lines instead of letters. Too thick and the strokes merge, and an 8 turns into a blob. And of course making the font bigger eats into the space I need for the holes, so every fix on one side broke the other side.
I ended up at 88 × 55 mm, 3 mm wider than a bank card. It still fits in a wallet and it gave me the room I was missing.
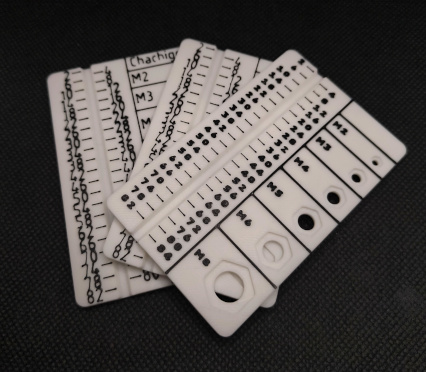
Slicer settings that saved the text
The card looks much better printed with a 0.2 mm nozzle, and that's what I recommend. But nobody wants to swap a nozzle for a screw gauge, so I spent some time getting it readable on a 0.4 mm.
The trick is to stop the slicer from throwing away details it considers too small:
- Wall generator: Arachne
- Minimum wall width: 60%
- Minimum feature size: 10%
- Minimum wall length: 0.1 mm
- Wall loops: 1
- Sparse infill: 5%, Gyroid
Arachne can do variable width walls, where the classic generator gives up as soon as a feature is thinner than one extrusion. Lowering the minimums tells it to actually try instead of silently deleting the thin strokes.
Two colors without a multicolor printer
There are two profiles in the download: one for automatic multicolor, and a manual one that adds a pause on the second to last layer so you can swap the filament by hand.
But there's a third option that costs nothing: print it in a single color, scribble over the raised text with a permanent marker, then wipe the surface before it dries. The ink stays in the recessed parts, the top comes clean, and the contrast is great. Takes 30 seconds and no pause in the print.
Get it
It's up on Printables, FreeCAD source file included, released under CC0. Public domain, no attribution needed, no strings. Want an M3 to M10 version, one with your own labels, or a batch to sell on your own stand? Go ahead. I got blocked by a license on this exact object, so it would be pretty stupid of me to put another one in the way.
And credit where it's due: thanks to Ghulaschsuppe for the original idea. If their version works for you as is, go boost it, it deserves it.